|
|
|||||||||||||||||||||||||
|
|
|
|
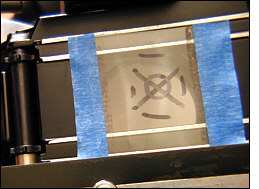 STEP ONE: Create
your target. You can use a small piece of flat plastic or some tape that
is stretched taut across the film gate. Then draw a design or "x" or
something on it. STEP ONE: Create
your target. You can use a small piece of flat plastic or some tape that
is stretched taut across the film gate. Then draw a design or "x" or
something on it.I do quite a bit of these, so I have two targets: One for 35mm and another for medium format. With tape, it's so thin that you can make your mark on the back side. With the thicker plastic, the marks I've made are on the "emulsion" side. |
|
|
|
|
|
|
|
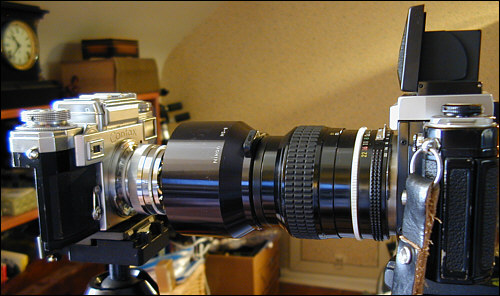
| STEP TWO: Aim the two cameras at each other. The lenses should be at the same height, and the cameras should be as level as reasonably possible. The idea is to get the film planes of both cameras to be parallel. The distance between the cameras has no bearing. Select something that makes it easy for you. Here, I am using a 105mm lens with a hood. The hood is nice to block out extraneous light, though it's not necessary even though every little bit helps. Important: Open both lenses to the maximum aperture and make sure both are set to infinity. On the target camera, set the shutter to "B" and lock it open with a cable release, if necessary. Or you can use "T," if that's available. | |
|
|
|
|
|
 |
|
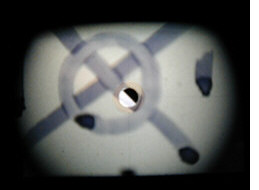
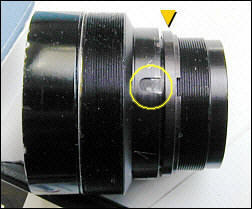
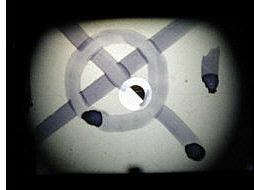
STEP THREE: While peering through the viewfinder, you will rotate either the front element, if it's a front-cell focusing lens, or the entire lens within its mount until the target is in focus. Do not move the focusing ring of either camera. The Sonnar requires you to rotate the collar and assemble the lens before checking infinity focus. You might want to get it as close as possible without a full reassembly. Then once you are within a quarter turn or so, test with a full reassembly. This is where the waist-level finder comes in handy, because you can peer into the finder while manipulating the lens on the target camera. This finder also has a pop-up magnifying glass, which is a big help when doing this. Use the ground glass, rather than the split-image. Out of focus is on the left, in focus is on the right. Once infinity focus is set, you can reassemble the lens. Obviously, do not rotate the lens within its mount or the front cell until it's reassembled. You should make a final check after reassembly. |
|
|
|
|
|
Final note: This works best when you have a bright light
source. I almost always do this during the day with the back of the target
camera facing an open window. |
|
|
|
|
.jpg)