|
|
||||||||||||||||||||||
|
|
|
Doctor, is the patient really dead?
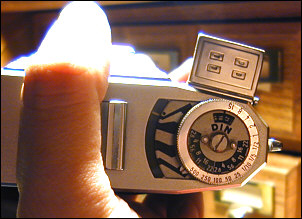
Make a quick check to see if the meter is sluggish or dead. That shouldn't be difficult. Simply open the little door and point it toward a bright light. Sorry about the "Close Encounters of the Third Kind" effect. I was trying to keep the camera very close to the light source to see if the needle moved even slightly. It didn't.
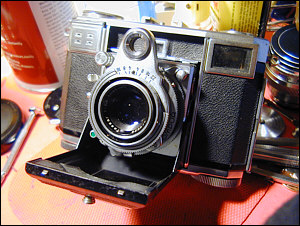
This is a camera I bought last year, and I saw that the meter was dead. I had no way of knowing if it could be revived, so I hope I don't end up with egg on my face.
|
|
|
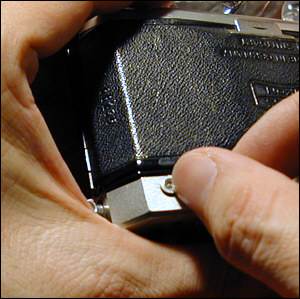
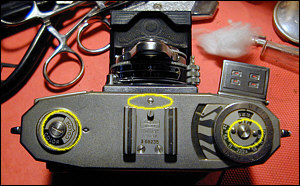 STEP ONE: Remove the three circled screws. You don't have to remove the accessory shoe, unless you're planning a total restoration. Remove the collar surrounding the calibration screw. I loosen with a spanner wrench and then remove using my thumbnail. |
 |
 |
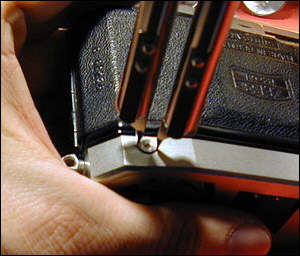
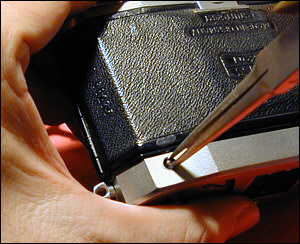 STEP TWO: You might have to use needle-nose pliers to remove the calibration post, if it doesn't come out easily. Lift off the cover. You might have to use the always handy thumbnail to pry up one end at a time. |
|
|
|
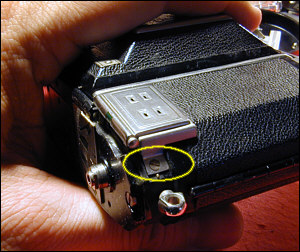 |
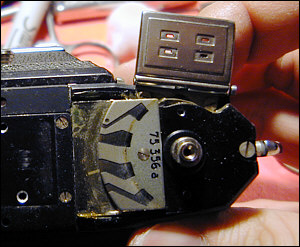
 STEP THREE: Remove the screw that holds on the meter cover (at left). The parts are simply the frame, the plastic cover and the selenium cell. |
|
|
|
 STEP FOUR: Clean all contacts. Burnish them using either steel wool or a very light abrasive material. Make sure you blow out any debris |
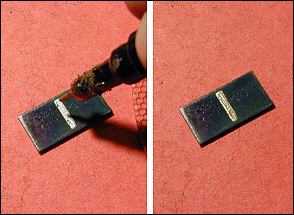 STEP FIVE: This step isn't always necessary, though I generally do it anyway. Using a small gold or silver pen, I simply draw a line over the small solder stripe. I've been using the Pilot brand Silver and Gold Marker. I haven't tried the new gel pens. Why mess with success? |
|
|
|
It lives!
|
 |
|
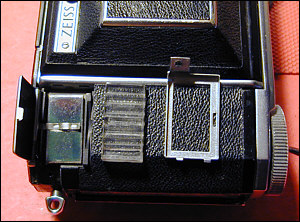
Final note: With the meter completely blocked from light, the needle should line up with the black dot, which you can see above. If it's not lining up, turn the small calibration screw on the back of the camera. |
|